Tuesday, August 4, 2009

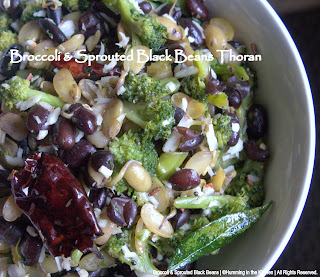
Broccoli & Sprouted Black Beans Thoran - A quick and yummy stirfry

I had about a cup of black beans that I had left on the countertop for sprouting. I usually leave a few different kinds of beans now and then to sprout. One evening when I got home from work, Amma had made this lovely broccoli thoran (stirfry). Along with rice, pulisseri (a yoghurt based South Indian Curry) rasam & papads, it was a lovely dinner. With parents here, we sure are getting pampered.

The broccoli and black bean combo was a very lovely sight to look at, I had to grab the camera, click a few pictures and post it :)

Ingredients-
Broccoli, rinsed well & cut into bite size florets – about 2 cups
Sprouted Black beans – 1 cup
Salt – ¼ + ¼ teaspoon or according to taste
Turmeric powder – ¼ + 1/4 teaspoons
Grated coconut, fresh or frozen – 2 tablespoons
Thai green chillies – 2 or 3 according to taste
Oil – 1 tablespoon
Mustard seeds – ½ teaspoon
Jeera(Cumin seeds) – ½ teaspoon
Curry leaves – 2 sprigs
Dry Red Chillies - 1 or 2
Method –
  • Sprinkle 1/4 teaspoon salt and turmeric powder on the sprouted beans and toss well to coat. Steam the beans for 8 to 10 minutes to cook them. We use our idli plate for all kinds of steaming.
  • Meanwhile, add oil to a pan. When sufficiently hot, add the mustard seeds, cumin seeds, dry red chillies and curry leaves, fry for a minute without burning.
  • Once the seeds are done spluttering, add the broccoli florets. Sprinkle some turmeric powder and salt, sauté for a couple minutes. Turn the heat down, cover with a lid, allow the broccoli to cook for a couple minutes. We like broccoli crispy and about 3/4th cooked. If let alone, broccoli could get pretty soggy. Check in a minute or two to make sure it is done to your liking.
  • When the beans are steamed enough, remove them to the pan with the broccoli. Mix it well and heat for a couple minutes on medium heat. The moisture from the beans will help cook the broccoli further. Remove the pan from fire and set aside.
  • In a blender/mixie jar, add the grated coconut and green chillies, pulse for a couple times. Add this mixture to the pan and mix well.
  • Transfer to a serving bowl, enjoy with your loved ones.

I think cauliflower would be a good variation for this dish too. This is my amma’s own instant & original recipe. Sending it to Lore’s Original Recipes round up.

Also sending it to MLLA 14, hosted by Susan, the brain behind the popular event.

Enjoy!

The very creative ladies Sadhana & Muskan have passed me the Kreativ Blogger award. Thanks very much gals, I deeply appreciate your encouragement.

Sunday, August 2, 2009

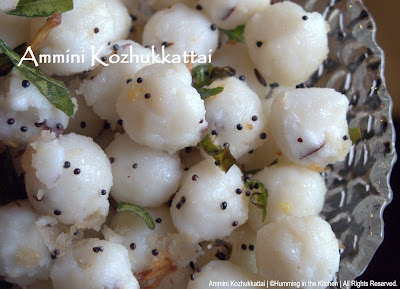
Ammini Kozhukattai (Steamed Rice balls) and an award

This dish is a childhood favourite of mine. This savoury snack is regularly made in Palakkad Iyer households during Navrathri season as a neivedyam (offering to the diety).

Navarathri was very much looked forward to during my school years in Palakkad. Nine festive days of getting dressed up in the evenings wearing pattupaavadai, long silk skirts with lovely golden trim, hair in pigtails adorned with fragrant mallipoo(jasmine), roaming the agraharam street with two of my friends. Among the two of them, they were best friends the first ten minutes and bitter foes the following ten minutes. This was a never ending cycle and my role was to listen to both ends of the argument and be their mediator. Most of the days during Navarathri, the hour long trip ended when we made it back home with our loot after visiting each of the households in the agraharam. Our loot consisted of all the yummy goodies from all the houses we visited. It was indeed a treat with the variety of snacks all mixed up. We would still continue our chitchat session in front of one of the three houses until an adult showed up, scolding us that it was getting dark.

Moving on to the recipe :) I love to make this dish in the evenings. My daughter absolutely loves to snack on these soft pearly white balls after school. On working days, I usually have the kozhukattai balls steamed and ready before I leave to work. All there is left to do in the evening is the tadka/tempering.

Ammini Kozhukattai Ingredients -
Rice Flour - 1 cup
Water - 2 cups
Minced fresh coconut - 1/2 cup
Oil - 1 teaspoon
Salt - 1/4 to 1/2 teaspoons, according to taste
For Tempering -
Oil - 1/2 tablespoon
Mustard Seeds - 1/2 teaspoon
Hing (Asafoetida) - less than 1/4 teaspoon
Curry Leaves - 2 sprigs
Green chillies - 2 or 3

How to make kozhukattai-
  • In a thick bottomed pan, add the water and salt, mix well to dissolve the salt
  • When the water starts boiling, add the minced coconut pieces.
  • Now add the rice flour half cup at a time, stirring quickly and uniformly so that no lumps are formed.
  • Add all the rice flour gradually and keep incorporating all of it, without forming lumps. Reduce the heat to a medium while doing this. In a couple minutes, the rice flour would get half cooked, and becomes a solid mass.
  • Remove from fire and allow it to cool, about 5 to 10 minutes.
  • Once the rice dough is cool enough to be handled, make tiny balls out of it using oiled palms. Steam these rice balls for about 8 to 10 minutes in a steamer. I use an idli cooker for all my steaming purposes. Remove the steamed balls from the steamer/cooker and set aside to cool.
Tadka -
  • In another wide pan, add 1 tablespoon oil for tadka.
  • When it is sufficiently hot, add the mustard seeds.
  • After the mustard seeds splutter, add curry leaves and the chopped green chillies. Fry for a couple minutes without burning. Add the hing and mix.
  • Remove the pan from heat, add the steamed rice balls and mix well.
Ammini Kozhukattai is ready to be snacked on. With milk, it fills up my little one just right until it is roti time at night. This is my entry to Cooking for Kids, a monthly event started by Sharmi of Neivedyam, hosted this month by Divya. The theme Divya has chosen for this month is evening snacks. Here is Divya's announcement, here is Sharmi's original announcement of the event. I read about the event Steamed Treats, started by Shruthi, from Divya's blog. This dish also goes to Shruthi's event.
Sangi from Simply Delicious has passed on the Kreativ blogger award to me. Thanks so much for the encouragement Sangi. I am truly touched.
I would like to pass this award to all my blogger friends. I have been discovering new and creative blogs by the day. It is so much fun to meet foodies and talk about food!

Wednesday, July 29, 2009

Lavash Crackers with Fruit & Sprouted Beans Salsa - A sweet n sour accompaniment to a crunchy cracker

I made Lavash Crackers from Peter Reinhart's book, The Bread Baker's Apprentice. Followed his relatively simple recipe, resulting in this "snappy Armenian-style crackers, perfect for breadbaskets, company and kids". Needless to say, my daughter was instantly hooked on to it and the cracker ended up being her dinner...almost. I had to bribe her so she would save some for snacktime tomorrow. Served it with this colorful chunky salsa.

Fruit & Sprouted Bean Salsa
The key to making a yummy salsa that not only tastes good but also looks good is to make sure the ingredients are all chopped up to almost same sizes. Adjust the level of sweetness/sourness/spicyness to your liking. You may not have to add sugar at all, if the fruits are sweet enough.

Ingredients-
Sprouted Azuki beans (red beans) - 1/4 cup Or alternatively, sprouted mung beans - 1/4 cup
Fresh pineapple, chopped - 1/4 cup
Fresh cherries, washed, pitted and chopped - 8 or 10 - about 1/4 cup
Fresh cucumber, peeled, seeded and diced into small pieces - 1/4 cup
Paprika - 1/4 teaspoon
Lemon Juice from 1 lemon
Salt - 1/4 teaspoon
Sugar (optional) - 1/4 teaspoon
Fresh Cilantro - washed, chopped - 3 or 4 sprigs
Turmeric powder - 1/4 teaspoon
Salt - 1 pinch

Method -
Sprinkle the salt and turmeric powder on the sprouted beans, shake well to coat. Steam the sprouted beans for 8 to 10 minutes; I usually use my idli plate for all steaming purposes. Remove the steamed beans to a flat plate, allow to cool.
Add the cooled beans, the chopped up fruits, cucumber, lemon juice and seasonings to a mixing bowl and toss to mix well and to distribute evenly. Check for salt/sugar/spicyness. Chill for at least half an hour before serving.

While the salsa chills in the refrigerator, proceed to bake the crackers. In order to do this, you should have the lavash dough kneaded and fermented, waiting to be baked.

Lavash Ingredients -
Unbleached bread flour - 1 & 1/2 cups (6.75 ounces) - I used King Arthur's Unbleached bread flour.
Salt - 1/2 teaspoon (.13 ounce)
Instant yeast - 1/2 teaspoon (.055 ounce)
Honey - 1 tablespoon (.75 ounce)
Vegetable oil - 1 tablespoon (.5 ounce)
Water - 1/3 to 1/2 cup ( 3 to 4 ounces)
The recipe called for 1/3 to 1/2 cup of water but I had to use 2 additional tablespoons for the dough to come together. I am guessing this must be due to the difference in measuring a cup. If I had weighed the flour to be an exact 6.75 ounces, the amount of water that the recipe called for would probably have been sufficient.

Method-
The key to crisp lavash, according to Peter, is to roll out the dough paper thin. The method to make Lavash is mostly as described in Peter's book. I have only altered it very slightly.
  • In a mixing bowl, stir together the flour, salt, yeast, honey, oil and just enough water to bring everything together into a ball.
  • Knead for about 10 minutes, or until the ingredients are evenly distributed.
  • The dough should pass the windowpane test. It is a simple test to make sure the gluten formation is sufficient. It took me about 12 to 13 minutes of kneading to pass the windowpane test. The website sourdoughhome.com has detailed information of the windowpane test. Click here to read it. Towards the bottom of the page, the concept is clearly explained.
  • Ferment at room temparature for 90 minutes. Or alternatively, mist some oil on the kneaded dough, cover it with plastic foil so the foil is in contact with the dough, leave it in the refrigerator overnight. If you are following the second method, leave it in the fridge immediately after kneading. (This is what I did - I mixed it the night before and left it in the fridge. About 2 hours before baking, I took it out of the fridge and left it covered, on the countertop).
  • When you are ready to bake, divide the dough into two halves and press the first half into a square with your hand and dust the top of the dough lightly with flour. Roll it out with a rolling pin into a paper thin sheet. You may have to stop from time to time so the gluten can relax. At these times, lift the dough from the counter and wave it a little, then lay it back down.
  • Cut the rolled out dough into diamond shaped crackers with a pizza cutter, transfer to a cookie sheet lined with parchment paper.
  • Preheat the oven to 350 F. If you would like to add spices like fennel, caraway seeds or sesame, mist the top of the dough with water and sprinkle a covering of seeds. I used just sesame seeds but the baked crackers wouldn't hold the seeds. In my second batch, I sprinkled the sesame seeds on the ball of dough and pressed them in before rolling out the dough. This was more effective, however I ended up with sesame seeds everywhere :)
  • Bake for 15 to 20 minutes. The crackers were done at exactly 15 minutes. Half way into the baking cycle, I turned the crackers upside down once. This way they would be evenly browned on both sides.
  • Remove the baking sheet from the oven, remove the crackers to a plate to cool.
  • Proceed with the second half of dough.
These crunchy crackers were perfect to be enjoyed with the chunky sweet, savoury, sour and mildly spiced salsa with sprouted beans & chopped up seasonal fruits.

..another view :)

Enjoy!
This chunky sprouted bean salsa goes to My Legume Love affair - 13th Helping, conceptualized by Susan and hosted by SunshineMom, of TongueTicklers. For Susan's original announcement with the host lineup, click here.
The fruit & bean salsa is my own original creation, so I am also sending it to the Original recipes round up #14 hosted by Lore.
I am also sending it to Susan's YeastSpotting. Thanks a bunch Sadhana & Muskan.

Technorati Claim Code : fkejw9y4n8

Tuesday, July 14, 2009

Pineapple Pachadi - Pineapple Curry in coconut paste with spices

Pineapple Pachadi is a regular in our kitchen during summer when pineapples are in season. The sweetness of the chunky pineapple pieces and the mild tangyness of the tamarind makes it a mouthwatering delicacy; the hint of mustard in the ground coconut paste adds a subtle yet distinct flavour to it. This sweet-tangy-yummy side dish is one of the delicacies in Palakkad Iyer wedding feasts. For the festive wedding look, fresh ripe and quartered grapes are added as a garnish.

Ingredients –
Ripe, Sweet pineapple pieces, cut into 1 inch cubes – 2 cups ~ ½ a medium sized pineapple
Tamarind pulp extracted from a marble sized ball of tamarind ~ ½ cup
Grated Coconut, fresh or frozen - ½ cup
Mustard Seeds – ¼ teaspoon
Thai green chillies – 2 or 3
Water - ¾ cup
Grated jaggery – 1 teaspoon
Turmeric powder – ¼ teaspoon
Salt – ½ teaspoon or according to your taste
For Tadka -
Oil - 1 tablespoon
Mustard seeds – ½ teaspoons
Curry leaves – 1 or 2 sprigs, cleaned
Dry Red Chillies – 1 or 2
Methi(Fenugreek) seeds – ¼ teaspoon

Method –
  • In a pan, add the pineapple pieces, water, salt, turmeric powder, jaggery.
    Cover with a lid, cook for 6 to 8 minutes.
  • Add the tamarind pulp, bring it back to a boil. Let it boil for a couple of minutes so the raw smell of tamarind is lost. By now the pineapple pieces would have got soft and mushy.
  • Grind the coconut, mustard seeds and green chillies in a blender/mixie to make a fine paste. Add 1 to 2 tablespoons of water as required to assist grinding.
  • Add the ground coconut paste to the boiled pineapple pieces, mix well. Adjust the consistency by adding 2 or 3 tablespoons of water as required, check for salt.
  • Bring the curry to a boil, simmer for 1 minute on low heat, remove from fire.

Tadka-

  • Add oil in a tadka pan. When hot, add mustard seeds. When they splutter, add the fenugreek and fry without burning. Add the red chillies, curry leaves and remove from fire. Add this tadka to the curry, mix.

Serve with Rice, Tomato Rasam and papads. My mom makes an instant rasam with only tomatoes that goes well with this. Will post it soon.

Wednesday, July 8, 2009

Quinoa, Peanuts & Beet Greens Pilaf with a refreshing Summer Drink

This pilaf is inspired from one of my favourite tiffins - Sabudana khichdi. The simple combination of roasted peanuts and jeera makes the khichdi very yummy. I substituted Sabudana with Quinoa. Quinoa is getting popular as a supergrain these days. This in fact is my first quinoa experience. Check out quinoa facts & history and its nutritional profile here and here respectively.
I had fresh beets that I had bought yesterday. All pretty in purple and green, they were looking at me and smiling - I couldn't ignore them! I like to use the greens that come with the veggies - the cleaned and cut up stalks usually go in dals or sambar and the chopped up greens go in with veggie stirfries. For this reason, I look at both the veggie and its greens when I go vegetable shopping. If one or the other looks questionable, most likely I won't pick it up.
To keep us hydrated during summertime, we drink a lot of Sambharam which is essentially spiced up buttermilk. Sambharam is a very popular thirst quencher in Kerala (also called Neermor in Tamil). I paired this Pilaf with Sambharam and it was indeed a lovely combination.
Update on 7/10 - I forgot to mention when writing this post that I had used pre-rinsed quinoa. This means that the quinoa has already been soaked and is ready to be cooked. Presoaking and rinsing reportedly releases the saponins that make it bitter tasting. The brand I used is called Ancient Harvest Quinoa and is available in most grocery stores in the US. I would feel horrible if someone made this pilaf and it ended up tasting bitter because of incomplete information.

Quinoa, Peanuts & Beet Greens Pilaf
Ingredients-
Quinoa - 1 cup uncooked (I used the traditional white variety)
Peanuts - 3/4 cup
Thai Green chillies sliced lengthwise - 8 or 10 - adjust according to your liking
Beet Greens - 7 or 8 leaves - I separated the vein in the center of the leaves for this dish so it didn't overpower the crunchy chewy nature of the quinoa.
Cumin seeds (Jeera) - 1 and 1/4 teaspoon
Turmeric powder - 1 pinch
Salt - according to taste
Method-
  • To cook quinoa, I followed an energy saving method that was described in the box it came in. Bring 2 cups of water to a boil and add 1 cup of quinoa, mix well. Bring it back to a boil. Remove from fire and cover the pan with a tight fitting lid. Leave it closed for 20 minutes.
  • After about 20 minutes, the quinoa would be cooked. Spread in a flat plate to cool it.
  • In another pan, add peanuts, toast to a golden yellow colour evenly without burning. No oil is required for this. Remove to a plate and cool. When cool to handle, peel them by rubbing between your palms, discard the peel. (If you are using store bought blanched peanuts that are already peeled, you can skip this peeling step).
  • Powder the peanuts in a spice grinder to make a coarse powder. Keep aside.
  • In a pan, add 2 tablespoons of oil. When it is sufficiently hot, add the jeera(cumin) seeds.
    After they splutter, add the chopped green chillies and curry leaves. Sauté for a couple minutes.
  • Add the chopped beet greens and a pinch of turmeric powder. Add about 1/2 teaspoon salt and sauté for another 3 - 4 minutes.
  • Remove the pan from the fire. Add the cooked quinoa, the powdered peanuts and mix evenly.
  • Check for salt and transfer to a serving bowl.
Sambharam (Buttermilk whipped with ginger, green chillies & curry leaves)
Traditionally this summer drink is made using buttermilk, I make this at home by blending together 1 part of plain curd(yoghurt) with 3 to 3 and 1/2 parts of water. If you have buttermilk, you can use it as well.
Ingredients-
Yoghurt - 1 cup (Or alternatively, buttermilk - 1 cup)
Water - 3 to 3 1/2 cups (If using buttermilk, add about 2 to 2 and 1/2 cups of water)
Fresh curry leaves - 3 or 4 sprigs
Ginger - 2 inch piece, chopped coarsely
Lime juice - squeezed fresh from 2 limes
Thai green chillies - 1 or 2
Salt - 1 and 1/2 teaspoon

Method-
  • In a blender jar, add the curry leaves, ginger, green chillies and blend well with 1/2 cup of water.
  • Add the yoghurt, salt, lime juice and another cup of water, whip.
  • Pour it through a strainer, discard the waste. Add the remaining water to the strained buttermilk, check for salt.
  • Pour the whipped up spicy buttermilk into glasses and serve. Enjoy!
I am sending this to the July edition of No Croutons Required, hosted by Lisa this month.
Also sending this dish to JFI:Peanuts, conceptualized by Indira of Mahanandi and hosted by Pavani at Cook'sHideout. Since this is my own original recipe, I am also sending this to the Culinarty Original Recipes #13 hosted by Lore.

Thursday, July 2, 2009

Minty Tomato Rice and my very first Award

If this is not one of the easiest of rice dishes, what is? Not only is it easy, the handful of fresh mint makes it lipsmackingly delicious. Paired with Beets & Black eyed peas & plain curd, it makes a very lovely and healthy meal. This combination is one of our favorites for work night dinners. Minty Tomato rice is yummy with curd and papads for lunch at work. When I heat it up in the break room, hungry coworkers usually go, 'mmm, that smells gooood!'

Ingredients -
Basmathi Rice - 2 cups, uncooked
Tomatoes - 4 or 5 large, chopped
Onion - 1 large, sliced
Ginger - 1 inch piece, sliced
Garlic - 1 or 2 pods, sliced
Thai Green chillies - 5 or 6, according to your desired level of heat
Fresh mint - leaves from 7 or 8 stems, ~ 1 cup
Fresh Curry leaves - 1 or 2 sprigs
Turmeric powder - 1/4 teaspoon
Salt - according to taste
Whole Spices -
Cinnamon - 2 inch piece
Cloves - 5 or 6
Cardamom - 5 or 6
Saunf(Fennel Seeds) - 1/2 teaspoon

Method -


  • Add 1/4 teaspoon salt to the chopped tomatoes and mix well to coat. Leave aside. This will release the juices of the tomato by the time it is ready to be fried in the pan.
  • Rinse the basmathi rice, pressure cook in 4 cups of water with 1/2 tespoon salt and 1/2 teaspoon oil. Spread the cooked rice in a flat plate to cool it.
  • In a pan, add 2 tablespoons of oil. When sufficiently hot, add the saunf(fennel seeds), followed by the rest of the whole spices and toast without burning.
  • Add the sliced ginger, garlic, green chillies and curry leaves, fry well for a couple minutes.
    Chop the mint fine and add to the pan, sauté well.
  • Add the sliced onions and a pinch of salt, fry well until the onion turns transluscent.
  • Add the chopped tomatoes with the released juices and a pinch of turmeric powder.
  • Mix well, sauté for a good couple minutes and close with a plate or a tight fitting lid. Turn the heat to low and let the tomatoes get mushy in the pan. The low heat will also keep the juices in the pan without drying out the mixture. The juice gives the rice its pretty reddish orange colour.
  • After the tomatoes have turned mushy, remove the pan from heat and cool the mixture for about 5 minutes. Add the cooled rice and mix well without any lumps, check for salt.

Tomato Rice is ready to be served with curd and papads. To make it a complete meal, pair it with a legume & veggie combination.

I am very happy to receive my very first award from my fellow blogger buddy, Jyoti. Thank you so much dear. Thanks for your encouragement. You made my day.

I would like to pass it on to Kalaivani, Sadhana & Muskaan, Usha, Parita & Hari Chandana. I love visiting your blogs and have learnt immensely from each one of you. Thanks a bunch for all your encouragement. It really means a lot to me.

Sunday, June 28, 2009

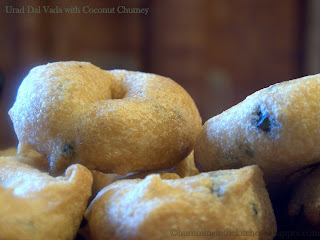
Uzhunnuvada (Urad Dal Vada) with Coconut Chutney - Doughnut shaped snack made with Urad Dal

Uzhunnu Vada needs no introduction :) Made from Urad Dal, it is served with Sambar and or Chutney or both. Crispy and yummy, it is a favorite among kids and grown ups.

Idli, Vada, Sambar & Chutney would undoubtedly rank very high in the top ten breakfast favorites if you ask any South Indian. Combined with Filter Coffee, (or Filter Kaapi) it can't get any better than that if you ask me. Definitely in my top five list :)

We had this crispy crunchy snack for our evening tea this weekend. Enjoyed it with friends - what could be better than that?

Ingredients for the Vada-
Whole or split Urad Dal (without the skin) - 2 cups
Thai Green Chillies - 10 or 12 chopped- adjust according to desired level of heat
Ginger - 1 inch piece, chopped very fine
Curry Leaves - 3 or 4 sprigs, chopped coarsely
Asafoetida (Hing) - 1/4 to 1/2 teaspoon
Peppercorns - optional - 2 tablespoons
Finely minced fresh coconut - optional - 2 tablespoons
Oil for frying
Salt - about 3/4 teaspoons - adjust according to taste
Yeilds about 25 - 30 medium sized vadas

Method -
Rinse urad dal in water a few times until the rinsing water runs clear. Soak rinsed urad dal in water for one and a half hours.
Drain the soaked dal, reserve the soaking water. Add salt and asafoetida to the soaked dal, grind to a smooth paste in batches. Add tablespoons of soaking liquid as required, to assist grinding. Make sure you don't add too much water, making the doughnut shape would be hard with a watery dough. This is the reason salt is added at the beginning, because adding salt at the end and mixing it up will release moisture which will then turn the dough watery.

In a medium sized bowl, add the ground dal, chopped green chillies, curry leaves, chopped ginger, peppercorns, minced coconut, and mix well to combine evenly. Take about 2 cups of water in a bowl, set it next to the ground dal mixture. Moistening the palms will release the vadas easily from your palm.

Heat oil in a pan. The oil should be sufficient enough to deep fry 5 or 6 vadas at one time. Drop a tiny ball of dough in the oil to make sure it is heated just right. If the tiny ball rises to the surface soon, it means that oil has heated just right.

Dip the fingers of the right hand in the water bowl. Pat your left palm with the wet right hand. Make a lemon sized ball of dough with the right hand and form a circular, flat patty on the left hand. Make a hole in the patty with the right index finger and gently release it onto your right hand. Slide the vada into hot oil. Depending on the pan and the amount of oil, you should be able to make about 5 or 6 vadas in a batch. Continue making vadas, each time with wet fingers.
I know this might sound silly but please make sure you don't accidentally dip your fingers in oil. (My classmate in college while making samosas, did this and showed up in the hostel with three blistered fingers. oh no!)

To serve crisp vadas for a party, here is a tip I learnt from my dad. When making large numbers, the vadas are fried in two batches. The first time, the vadas stay in hot oil for barely a minute or two, to hold their shape. The entire dough is made into vadas, fried quickly and removed from oil. This can be done ahead of time. Here are the vadas, fried quickly once - notice how they are still pale brownish white but holding their shape. These are clearly not cooked in the inside as you can tell.

When the vadas are fried the second time, add 7 or 8 vadas in a batch instead of 5 or 6. Don't worry about overcrowding the pan because they won't stick to each other since they are already fried once. I do this everytime I make them. I have seen that double frying gives home made vadas the restaurant style crunch. Once they are golden brown in color, remove from oil. Serve hot with Coconut Chutney.

Coconut Chutney Ingredients-
Grated coconut - 1 cup - fresh or frozen. If using frozen, thaw to room temparature.
Thai green chillies - 5 or 6 - according to your taste
Ginger - 1/2 inch piece
Pottukkadalai (Dalia) - 2 tablespoons
Cilantro - 5 or 6 stems with leaves - cleaned well and chopped
Salt - according to taste

Method -
Grind everything well in a blender or mixie jar with sufficient water and transfer to a serving bowl. Adding tadka to the chutney is optional.

Enjoy with friends and loved ones :)

Thursday, June 25, 2009

Drumstick leaves Molagoottal - Muringa leaves and Moong daal with coconut and spices

Drumstick or Muringakkai is a very popular vegetable in South India. How can it not be, with dishes like the flavorful Muringakkai sambar? Muringai ilai Molagoottal, the topic of this post, is made using drumstick leaves and lentils, and is a very popular dish among Palakkad Iyers. It is traditionally made with Toor dal but my mom always makes it with Moong dal.

In a typical everyday menu in our household, Muringai ilai molagoottal would accompany white rice topped with a dollop of ghee, with arachu kalakki and rasam. Arachu kalakki (means mish-mash, if you ask me) is a curd based side dish with fresh cucumbers or tomatoes, spiced with green chillies and ginger and tempered with mustard seeds, red chillies and curry leaves. After this dual main course (molagoottal and arachukalakki makes a pair, so does molagoottal & rasam) the third course would be rice and curd with a simple pickle, or more rasam :)

We use the Moringa leaves primarily to make molagoottal and muringai ilai adai. Muringai ilai adai is a crepe similar to dosa but thicker, and is one of our favorite breakfast dishes.

In my grandfather's house that I grew up, we had a muringakkai tree in our yard. It stood near the mossy dark laterite wall surrounding the yard and was visible from the road leading to our house. Tall and slender, the branches of the tree swayed back and forth with the 15 or so drumsticks in various stages of growth. The branches would break at the slightest tug so harvesting them was best left to the elders. As a kid, I loved gathering the fresh flowers that fell. About half of them were on our side of the wall and the other half lay scattered on the dusty road. My mom made a poriyal(stir-fry) for me, with the ten or fifteen flowers I brought in. Mildly spiced and full of freshly grated coconuts, I loved to eat it with Thayir saadam (Curd rice). The poriyal wasn't even sufficient for the tiny me, how could I share it? She would add a handful of drumstick leaves to make up for the quantity but the poriyal with just the flowers was my favorite.

Two years back, we brought home a muringakkai plant from our local farmers' market here and have been enjoying it since. Even though we live in sunny Florida, we've had an extreme cold spell in winter the last two years when local TV channels advise you to cover your plants in order to protect them. We would wrap the plants in our backyard with blankets, then wait with our fingers crossed, hoping they make it. The first winter with us, the muringakkai plant didn't make it - or so we thought. When we removed the blanket, the poor plant with its wilted leaves looked so sad and cold. The ice formed in the cells apparently killed the plant, we said to ourselves. One sunny beautiful day in the next month or so, my husband caught a tiny & tender baby shoot sprouting out from the ground, saying hello to the morning sun! Looks like we have a fighter :)

Wikipedia lists extensive uses of this plant, Moringa oleifera. "The leaves are highly nutritious, being a significant source of Beta-carotene, Vitamin C, Protein, Iron and Pottassium. "

More from Wikipedia below - I have highlighted the nutritional comparisons with other vegetables/fruits.

A large number of reports on the nutritional qualities of Moringa now exist in both the scientific and the popular literature. Moringa leaves contain more Vitamin A than carrots, more calcium than milk, more iron than spinach, more Vitamin C than oranges, and more potassium than bananas, and that the protein quality of Moringa leaves rivals that of milk and eggs. The oral histories recorded by Lowell Fuglie in Senegal and throughout West Africa, who reports countless instances of lifesaving nutritional rescue that are attributed to Moringa (Fuglie, L.J., 1999, 2000). In fact, the nutritional properties of Moringa are now so well known that there seems to be little doubt of the substantial health benefit to be realized by consumption of Moringa leaf powder in situations where starvation is imminent. Nonetheless, the outcomes of well controlled and well documented clinical studies are still clearly of great value. (Jed W. Fahey, 2005)

The Wikipedia article on Moringa is here, it is very informative and it talks about ben oil, which is extracted from Moringa seeds. Make sure to check it out. But don't go just yet!

Muringai ilai Molagoottal Ingredients -
Drumstick leaves de-stemmed and rinsed in cold water - 2 cups
Dry roasted Moong Daal - 1 cup. (Alternatively, you can use Toor dal too)
Toast the Moong dal in a pan, stirring well so it doesn't stick to the pan, for about 6-8 minutes
until it is brownish & toasted. This toasting ensures the dal doesn't get too mushy when it is pressure cooked.

To grind into a paste -
Urad dal - 2 tablespoons
Red chillies - 2 or 3 - depending on your level of heat.
Grated coconut - 1/2 cup
Cumin seeds(Jeera) - 1 teaspoon
In a small pan, add 1 tsp oil, add the urad dal and fry it without burning until it turns brownish red. Now add the red chillies and fry it in the oil. Remove from fire and transfer to a blender/mixie jar. Add the jeera and grated coconut, grind well into a smooth paste. Add 1 or 2 tablespoons of water to assist grinding. Set aside.

For tempering -
Mustard seeds - 1/2 teaspoon
Urad dal - 1/2 teaspoon
Red chillies - 1 or 2
Curry leaves - 2 sprigs

Method -
Pressure cook the dal with a pinch of salt and turmeric powder.

In a pan, add the ground coconut paste, the cooked dal, 1/2 cup water and mix well. Add the cleaned muringai ilai leaves, bring it to a boil. Boil for a couple minutes and check for salt.

Remove from fire. Now is the time for tadka, or tempering. In a small pan, add 1 tsp oil and when it is hot, add mustard seeds. When they splutter, add urad dal, red chillies and curry leaves and mix well. Add this to the curry that was just removed from fire.

Mix well, serve hot. There you have it. Nutritious and yummy!

Leftovers make an excellent side dish for rotis. When you reheat the dish, just add a chopped and saute-ed onion, tomato and a couple more green chillies.

My little one loves molagoottal with plain rice and ghee. So I am sending this to Cooking For Kids - Leafy greens hosted by Pavani, conceptualized by Sharmi, of Neivedyam. Here is the original event announcement at Sharmi's blog.

Sunday, June 14, 2009

Daring Cooks' June Challenge - Potstickers with homemade Paneer filling

Jen, of use real butter chose Chinese dumplings to be the Daring Cooks' June challenge. When I saw this, the first filling that came to mind was Paneer. This is my first time participating in the Daring Cooks'; I had fun all the way.

When I started thinking about Chinese dumplings, Ulundhu kozhukkattai came to my mind. The wrapper is made using rice flour and the filling would be Urad dal usli. This is traditionally made during Ganesh chaturthi, accompanied by Ganeshji's favorite, the very famous Modakam. The filling in Modakam is poornam (made by cooking grated coconut in jaggery & ghee, spiced with cardamom). To describe the shape of modakam, imagine a white pearly & soft ball the size of a lemon with one pointy end, filled with gooey yummy poornam. The savory one is boat shaped, pretty much like the shape of the chinese dumplings, except that they weren't pleated like the chinese dumplings. My dad tells me that the savory one was made boat shaped inorder to distinguish between this and the sweet version. Yummy.

I decided to go for all purpose flour. To make it slightly more nutritious, I added an itsy bitsy bit of oat flour. I didn't want to risk making it taste oatsey (I just invented a new word? lol) but still wanted to satisfy my 'make it healthy' reminder that pops up everytime :) so I added just 2 tablespoons. I got around 16-18 dumplings, so each would have had approximately 2/18ths of a tablespoon of oat flour in it. Very little, yet something. So on hindsight, I'll make it double the next time. I got this oatsey smart idea from Usha after reading her post about Oat Pav. Thanks Usha, for the awesome tip!

So, going to the recipe:

Ingredients for the Paneer filling -
Paneer - I made paneer using six cups of whole milk. The paneer I got was almost the size of a large grapefruit. I know that sounds kinda vague, but I am pretty sure it should have weighed at least a pound. Even slightly more. Crumble the paneer into smaller chunks and keep aside.
Onion - 1/2 of 1 large red onion, chopped finely
Tomato - 1 Roma tomato, chopped finely
Cilantro - 5 or 6 stems, leaves and all, cleaned and washed
Coriander powder - 1 tsp
Chilly powder - 1 tsp
Turmeric powder - 1/4 teaspoon
Cumin seeds (Jeera) - 1/4 teaspoon

Spice powder -
Saunf (Fennel seeds) - 1/4 teaspoon
Cloves - 5 or 6
Cardamom - 5 or 6
Dry roast the spices one after the other in a pan to toast well and release the oils, make a fine powder. I use my favourite gadget, my goodold mortar and pestle for this.

Method to make the filling -
Heat a pan, add about 1 tablespoon oil. Add the cumin seeds. When it splutters, add the onion and saute for about 3 minutes until tender and transluscent. Now add the tomatoes, turmeric powder and a pinch or two of salt. Cook for a few minutes until the tomatoes are mushy and cooked. Add the coriander and chilly powder and fry for about a minute without burning. Add the crumbled paneer and mix in well. Break all the lumps and mix evenly. Once it is uniformly mixed, add the spice powder and combine well and remove from fire. Add the chopped cilantro and mix well. Check for salt, set aside in a bowl to cool.

Ingredients for the wrapper -
Unbleached all purpose flour - 1 cup
Salt - 1/4 teaspoon
Oats flour - 2 tablespoons ( I powder steel cut oats in my mixie and save it in a ziplock in my freezer to use anytime)
Water - 1/4 cup or slightly more

Method to make the wrappers-
Combine the flours in a bowl, add salt and mix well. Make a dough adding water as required. The dough should not be sticky. Knead it well for a couple minutes and make balls the size of gooseberries (nellikkai).

Flatten each ball as thin as possible, and make pleats. I learnt this technique from the user Lisa at the Daring Kitchen. Lisa has detailed pictures in the daring cooks' forum. Very helpful pics Lisa. Thanks for all your effort for putting it together. Here is Lisa's post at her blog.

Apparently you could make 3, 4 or 6 pleats on each side of the dumpling. Not wanting to make it too complicated, I went for just 3. Basically you make 3 pleats on one side, 3 pleats on the other, fill it with the filling. Wet the inside of the pleats with water, then stick them together.


Method to cook the Dumplings -
Dumplings can be cooked in a variety of different ways- boiled, steamed, or pan fried.
Potstickers, which are essentially dumplings, are saute-ed on one side, and then steam cooked. In other words, you would add oil to a flat bottomed pan, then arrange the dumplings on the pan and heat it briefly to brown the bottom side, then add water to the pan and close it with a lid. The dumplings would be cooked in the steam. They are then served with dipping sauce, with the brown sides facing up.

I decided to do that and happily I realized I could easily just pan fry them without water. I picked a round bottomed pan for this, added about 1 and 1/2 tablespoons of oil and arranged about 6 -8 of the dumplings. With my handy pair of tongs, I shifted them back and forth to make sure as much of the wrapper was getting cooked. When brown on one side, I turned them over and did the same. Then, I turned the heat to low, and closed the lid. Now with a keen eye on it (a keen pair of eyes actually), I let it cook for a few minutes on each side. I had about 3 batches to pan-fry.

I had initially planned to serve this with khatti-meethi chutney but due to shortage of time, ended up serving my potstickers with ketchup. We had this for our evening chai. Yummy, all of us loved it. Pretty filling snack I should say :)


I find this has to be eaten right away when pan-fried. When it is cool, it seems to have a tendency to harden when cooked this way. I have 3 of them that were leftovers, I'll find out for sure tomorrow. A couple minutes in the microwave should warm them up, I am guessing. The next time, I might try just steaming them.

I already have a bunch of fillings lined up in my mind for this. Amma had a brilliant idea too. Potstickers, I see you being a regular in our kitchen.

Enjoy!
Monday, June 1, 2009

Mango Pudding

If you ask me which is my favorite color, the reply would most likely be a long & inconclusive answer. Coz I love them all! I am pretty sure there are others that have the same opinion. Or, my short answer would be, 'it depends' :)
Like the smell of my favorite foods, each color to me brings fond memories of dear ones, like yellow. It is my dad's absolute favourite color. My mom has all kinds of saris in all shades of yellow-bright yellow being the most prominent of them. She even has more than two that are the exact same! When I was a little girl, all the dresses he would bring me after his trips were yellow. As a newly married couple, he took us to this new mall in Chennai to get our onakkodi for our first Onam. It was this beautiful beautiful salwar in this bright yellow and white and lovely green. Absolutely lovely. After almost 10 years, the style of the salwar is not trendy anymore but I looove wearing it.

After that intro you wouldn't be surprised that I picked yellow for FIC:Favourite, conceptualized by Sunshinemom of TongueTicklers and hosted by Curry Leaf. My parents just got here to spend the summer with us, so I made mango pudding for my dad on Sunday. We enjoyed the bright yellow, sinfully yummy (with all the calorie rich ingredients!) pudding. But then when I sat down to write about it, I realized that the deadline for FIC:Favourite was yesterday which I narrowly missed.

Since this is a dessert with Mango, I am sending it to Srivalli's Mango Mela.
Being a novice blogger, it is great to discover creative blogs and interesting events every day. Awesome blogs and really lovely events, ladies. Hats off to you gals!

Now off to the recipe -
This is quick to assemble. Like someone said, this is the dessert you make when you've planned to put together a nice fancy dinner for a bunch of people but don't want to compromise and serve store bought icecream, at the same time, you are so overwhelmed to think about dessert :)

I have made this two or three times with gelatin earlier, before I knew that gelatin is of animal origin. Ever since I knew that, I have been wondering about agar agar, the plant substitute for gelatine. I used agar agar on Saturday morning according to package directions on one of my own test recipes. It was yummy to eat when slightly warm before I chilled it in the fridge, but it turned stone hard in a matter of 2 hours! I couldn't even scoop it out. Yes, it was that bad :(
I am so glad I didn't try agar agar for the first time in the mango pudding. Phew! So when I made the pudding on Sunday, I used much much less than the suggested quantity of agar agar, it turned out just the way I wanted.

Ingredients -
1, 8 oz pack of Cream Cheese (I used the Philadelphia brand)
1, can of Kesar Mango Pulp - the can I used was 1 lb and 14 oz (850 gm)
1, 8 oz can of sweetened condensed milk (I have used Carnation and La Lechera, both are fine)
1/2 cup water
1/2 teaspoon agar agar powder - I read somewhere that it is also available as flakes. This is a fine powder that I used. I bought this one at the healthfood store. It's brand name is 'Now'.

Method -
It would be better to take the cream cheese out of the refrigerator and leave it on the countertop for 1 or 2 hours before you mix everything together. This makes it easier to beat.
Warm 1/2 cup of water in a pan and add the agar agar powder slowly while stirring the water so no lumps are formed. Alternatively, you can mix the agar agar powder in 1/2 cup water very well and bring it to a boil while stirring really well. Boil for a good 4 or 5 minutes so the agar agar powder sortof dissolves in water and the whole thing becomes semi jelly like. Set aside. (I kept an eye on it, stirring it once in a while.)

In a medium to large bowl, empty the cream cheese from the pack and beat well with an electric beater for 2 or 3 minutes without any lumps. To this, add the mango pulp and beat well for another 2 or 3 minutes. Now add the can of condensed milk and beat again to incorporate everything. To this add the agar agar mixture and beat it; make sure it is well incorporated. Pour this mix into a serving bowl and cover it, chill in the refrigerator for 4 to 5 hours or overnight.
There you have it, creamy and delectable mango pudding. We loved having this luscious pudding for dessert after our Sunday lunch. Made from the high calorie condensed milk and cream cheese, what's not to like? :)

Enjoy!

Wednesday, May 27, 2009

Spinach, Sweet potato & Channa dal curry with tangy Tamarind and Panch Phoran

I admit; I have been bitten by the sweet potato bug. This recipe however, was not just because of that. My pantry was so full, so was my refrigerator, after a trip to the local supermarket and the Indian grocery store. With so many possibilities, what's a foodie to do? I found myself in the middle of all the ideas and combinations flying around. Mustard and jeera are my default everyday spices, I wanted to try my newfound favorite, Panch Phoran.
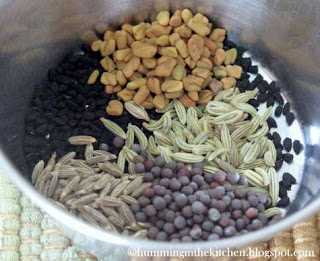
Panch Phoran has Mustard seeds, Jeera(cumin), along with Nigella(kalonji or black caraway seeds), Saunf (fennel seeds) and Methi (fenugreek) in equal quantities. In her Cauliflower dal with Panch Phoran recipe, Susan had mentioned that you could powder the blend for a more intense flavor. I had left out the powdering part when I made the dal last week, since I was so new to Panch Phoran. Now that I knew and liked the blend, the thought of powdering it kicked in. I wondered, what if I toast it, then powder it ?

My recent sweet potato trials were both flat breads with wheat. I had started wondering, how would sweet potato taste in a gravy? I was thinking the gravy had to be somewhat spicy because it is after all, sweet potato. I had to include a legume that night, so I went for channa dal. The very fresh bunch of spinach was calling my name from the fridge, I couldn't ignore spinach!

So I got the spinach from the fridge, a sweet potato and some chana dal from the pantry and set out to make dal to go with roti. I wanted it to taste different from my regular dal, so I went for tamarind instead of tomato.
The outcome of all these randomly ordered thoughts/ideas on a Saturday night was this daal. It turned out verry good.

Ingredients -
Onions - sliced, 2 medium
Ginger - 1 inch piece , sliced into thin strips
Garlic- 1 or 2 pods, sliced
Thai Green chillies - 5 or 6, slit lengthwise into 2
Chana Dal - 3/4 cup
Tamarind - a small lime sized ball (or about 1/2 tsp concentrate)
Sweet potato - 1 medium, diced into 3/4 inch cubes
Fresh Spinach leaves and fine stems- about 1 and 1/2 cups
Oil - about 1 or 2 tablespoons
Turmeric powder - a pinch
Salt - as per your taste

Panch Phoran - 1/2 tsp for powdering + 1/4 teaspoon for tadka

Method -
Pressure cook channa dal; make sure it is cooked just right, not too mushy. Alternatively you could cook it directly on the stovetop in a saucepan for 20-25 minutes until it is done. Set aside. I like to add a pinch of salt and turmeric powder when I cook my dal.

In a small mixing bowl, add the tamarind; pour about 3/4 cup of hot water, set aside. You can skip this if you are using readymade tamarind paste. Just mix it in warm water without any lumps and set aside.

Heat a pan, when it is sufficiently hot, add 1/2 teaspoon panch phoran. Toast it dry, until the whole spices are evenly browned without burning, about 1 or 2 minutes. Remove from fire and grind it to make a fine powder, set aside. I do this grinding in a mortar and pestle. This buddy of mine is a hand-me-down, one of the indispensable gadgets in my kitchen that I treasure greatly.

In the same pan, add about 1 tbsp oil and when it is sufficiently hot, add the 1/4 teaspoon panchphoran. This is for the tadka, make sure the spices splutter without burning. Add the sliced ginger and garlic. Add the green chillies except one. Save this one for later. Sauté for a couple minutes on medium heat. Add the onions and sauté for 3-4 minutes until they almost brown. To this, add 1/2 of the powdered panchphoran and mix well. Remove from heat and transfer this mixture to a temporary bowl/plate.

Return the pan to the stovetop and add the remaining oil, the spinach leaves and a pinch of salt and turmeric powder. Saute on medium heat until the leaves are wilted. This will release moisture. Keep moving the leaves around and let the moisture evaporate, 3 or 4 minutes. Remove the spinach leaves to the same bowl/plate as the onion mixture.

In the pan, add the sweet potato cubes and add enough water to just immerse the cubes (about 3/4 to 1 cup of water). Add the remaining half the panchphoran powder, 1 slit green chilly, 1/4 teaspoon salt and a pinch of turmeric powder. Cover the pan and simmer for about 8-10 minutes, until the sweet potatoes are tender and just done. You want them cooked just right, not mushy.

While the potatoes simmer, extract the pulp from the tamarind that is soaking in water. The hot water that was poured on the tamarind should have cooled down by now. When in doubt, feel it before you dip your hand in it! If it is manageable, mash well and squeeze with your clean fingers and extract the pulp. Sieve the pulp to a bowl and discard the rest. You should now have about 1/2 cup of reasonably thick tamarind extract.

If the potatoes are tender, add the tamarind extract and bring it back to a boil. Boil it well for a good 4-5 minutes so the raw smell and taste of tamarind is lost. Add the cooked channa dal and mix well, check for salt. Now is the time to adjust the gravy to suit your liking. Add about 1/2 cup water if you want the curry to be thinner. Bring it to a boil.

When the curry starts boiling, add the stirfried onion mixture to the curry. Mix everything well. Let it boil for a couple minutes. Remove from fire to a serving bowl.

The procedure might sound a little long but actually it is not that long. I didn't want to sauté the onions, then add water and sweet potatoes to the same pan, one after the other. There will not be any trace of the onions by the time the sweet potatoes are cooked. So I sautéed them, removed them to a bowl, cooked the potatoes and then brought everything together. The curry was delicious, with crunchy onions, pretty spinach and the mellow but spicy sweet potatoes, not to mention the tangy tamarind base!
We had it with plain roti on Saturday night. One satisfying meal with cucumber and carrots on the side.I can picture us having it with plain basmati rice, topped with one big blob of ghee. Mmm.. that would be perfect as a healthy comfort food.
Enjoy!

culinartySince this is my original creation, I am sending this to the Culinarty Original Recipes Roundup #12, hosted by Lore. My previous entrty to this same event was the outcome of an almost empty pantry a few months ago. This one is fresh from my kitchen, when my pantry and fridge were very full.
I am also linking this post to Foodista as per Alisa's request. Thanks Alisa :) Sweet Potato on Foodista

Wednesday, May 20, 2009

Cauliflower Dal with Panch Phoron for Tried & Tasted with Sweet potato roti

Panch Phoron is new to me. The first time I heard about it is from Raghavan Iyer's famous cookbook, 660 Curries. Ever since I read about this spice blend a few months ago, it has been in the back of my mind. I even bought a pack of nigella seeds in preparation for that. Again as usual, I just didn't get around to actually do it.

Then I read about Tried and Tasted at Vaishali's Holy Cow featuring Susan's blog, Fatfree Vegan Kitchen. The brilliant idea 'Tried & Tasted' was originated by Zlamushka of Zlamushka's spicy kitchen. I can totally relate to it Zlamushka, my bookmarked recipes' list gets longer every day.

I couldn't wait to check out what was cooking in this month's featured blog, Susan's Fatfree Vegan Kitchen. Was it the bright orange, or the Panch Phoran that caught my eye? Probably both. Was it also because Masoor Dal and Cauliflower were readily available in my pantry and fridge respectively? Joy, joy.

Being an amateur blogger, these three blogs are fairly new to me - amazing is all I can say about the three sites. Very very creative, ladies. Hats off to you.

I had already planned on making rotis with the one last sweet potato I had, after my yummily successful Sweet potato Batura. So I decided to pair the daal with Sweet potato roti. Whole wheat, lentils & cauliflower, not to mention the beta carotene rich Sweet potato. All this in one meal. Priceless. I couldn't wait to try Panch Phoran. I am so glad I tried it. Yummy. I instantly got a nod from loving hubby. Thanks Susan. Here is Susan's original recipe for Cauliflower Dal with Panch Phoran.

I increased the quantity of red pepper flakes from 1/8 teaspoon to 1 teaspoon. Other than that, I followed the recipe to the letter. Yum Yum.

Even though I have masoor dal readily available, I should confess that toor dal or mung dal are my default dals. It must be because these, along with chana dal are traditional South Indian staple lentils in Iyer households. When the dal and the veggies were cooking side by side, I was making rotis, dreaming about the green cilantro sprig adorning the final dish. Crazy me.

The Dal looks very pretty doesn't it? :)

For the rotis -
Whole wheat flour - 2 cups
Washed, peeled & grated sweet potato - 3/4 cup
Jeera (Cumin) powder - 1/2 teaspoon
Chilly powder - 3/4 teaspoon
Salt - about 1/2 teaspoon
Cleaned, chopped Cilantro leaves - 1/2 cup
Water - about 1/4 to 1/2 cup

Method -
Mix everything to combine well. Mix evenly for a couple minutes to make sure there are no lumps and the spice powders and salt are evenly distributed. Add water and make a smooth dough, knead for a few minutes. Rest for about 10 minutes and make rotis like usual.

We thoroughly enjoyed the meal, thanks to Susan, Vaishali & Zlamushka. Sending the Cauliflower Dal to Tried and Tasted May 2009. I had fun checking out Susan's Fatfree Kitchen.

Enjoy!

Sunday, May 17, 2009

Sweet potato Batura with Mutter Paneer

I've been wanting to include Sweet potatoes in our everyday diet for a very long time. I just didn't get around to actually do it. Then I tried Parita's baked sweet potato chips which came out really good.
My second trial was to try to fortify diamond cuts, since I hadn't made it or eaten it since I left college. Diamond cuts is a very yummy deepfried savory snack that is pretty popular in Kerala. It is made with maida(all purpose flour), the dough is rolled out thinly, and like the name suggests, the rolled out dough is cut into diamonds and deep fried. A bag of yummies and loving, chatty roomies- what more do you need? Diamond cuts wasn't familiar to me until I got to my college hostel. There is a sweet version of diamond cuts, which is made by dipping these fried goodies in sugar syrup. Sinful, but yummmy!

So early this week I made savory diamond cuts by mixing up cooked and pureed sweet potato in the dough. Eating it after almost 10 years, it was of course yummy. The cooked mashed sweet potato made it very soft, my little one absolutely loved it. However, I realized I was actually cooking the sweet potato twice!! I would boil it to begin with, mix it up in the dough and deep fry it! Hmm.. I started wondering..what are my other options?

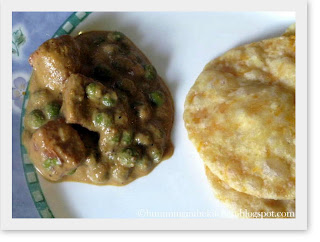
Then of course my little one loooves batura. I make it once in a while - once every few months. So I grated a medium sized sweet potato and made batura. Now this batura is a keeper. We had it with Mutter Paneer. I made paneer at home after a realllly long time. (This new addiction called blogging is starting to affect my waistline!!)

Ingredients for the Batura -
All purpose flour - 1 and 1/2 cup
Grated Raw Sweet potato - about 3/4 cup
Ajwain seeds powdered - about 1/4 teaspoon
Salt - about 1/2 teaspoon
Curd (Yoghurt) - about 1/2 cup to mix the dough

Method -
Mix the flour, salt, powdered ajwain in a mixing bowl to combine well. Add the grated sweet potato and mix in, to make it a crumbly mixture. Mix evenly for a couple minutes. Add the yoghurt and bring the dough together. Add a few more drops of yoghurt if the dough needs more moisture to come together. Or add a tablespoon of flour if the mixture is too sticky. Knead well to make a smooth dough. Set aside for 6 to 8 hours.

When I make baturas, I mix up the dough in the morning, before I leave to work.
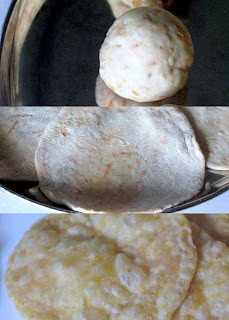
When you are ready to deep fry it, make lime sized balls, roll it into thin rounds and deep fry in hot oil.

This quantity should yeild about 10-15 baturas, depending on their size.

Ingredients for Mutter Paneer-

Fresh or frozen green peas - 1 cup (I used frozen)
Onions - 2 medium sized, chopped
Tomatoes- 3 medium sized, chopped
Ginger - 1 inch piece, sliced
Garlic - 1 or 2 pods
Cashew nuts - 2 tablespoons
Milk - 1/2 cup
Coriander powder - 1/2 teaspoon
Chilly powder - 1/2 teaspoon (or as spicy as you would like)
Turmeric powder - 1/8 teaspoon
Oil - 1 tablespoon + 1 teaspoon
Ghee - 1 teaspoon for tadka

Whole spices-
Cardamom - 4 or 5
Clove - 5 or 6
Cinnamon - 1 inch piece
Saunf(Fennel seeds) - 1/2 teaspoon
Heat the spices separately for a few minutes each without burning and grind to a fine powder.

Paneer - cut into cubes - about 1/3 pound, fresh or frozen. I made fresh paneer from 5 cups of milk and got around 20~25 cubes. I am making paneer after almost 4 or 5 years. Manjula's Kitchen has handy videos which are pretty popular and helpful. Fry the paneer cubes in oil and drain on paper towels.

Method -
Combine the coriander powder and chilly powder in a small cup and keep aside. This needs to be added to the curry at the very end.

In a pan, heat 1 tbsp oil and saute the onions in medium heat for about 1 minute. Add the chopped ginger and garlic, cashew nuts and sauté for about 2 minutes. Add the tomatoes and the turmeric powder and sauté till the raw smell is lost, about 4 - 5 minutes. Remove from fire and cool for about 5 - 10 minutes. This needs to be blended to a puree.

After the onion&tomato mixture is cool enough, blend it into a smooth puree. Meanwhile, add a teaspoon oil to the pan and briefly stir fry the green peas with a pinch of turmeric powder. Add the blended puree, the ground masala powder and about 1/4 teaspoon salt, stir fry for a couple minutes. Add the milk and combine well. Adjust the gravy to the required consistency - add about 1/2 cup water if required. Bring it to a boil and add the fried paneer pieces. Simmer for about 5 minutes. Remove from fire and check for salt.

Keep the pan open in preparation for the spicy tadka. For this we need the coriander powder + chilly powder mixture that we combined in step 1.

In a small tadka pan, heat 1 and 1/2 tsp ghee. When the ghee is hot, remove the pan from from fire and add the coriander+chilly powder mixture and immediately pour this into the curry.
This needs to happen in about 5 to 10 seconds, so the spice mixture doesn't burn in the ghee.

This tadka gives a rich ghee flavor to the curry.

The mutter paneer is ready. Transfer to a serving dish and garnish with fresh cilantro leaves.
Yum. Enjoy :)

I made sweet potato rotis with the one last sweet potato I had.
Yummy recipe coming up soon..

Friday, May 15, 2009

Green peas, Mint and Soy Pulao

A few months ago on a Saturday night I found myself staring at the pantry, not finding anything that motivated me to make dinner. Among other things, there was this bag of soy granules (also known a Textured Soy Protein) that I had bought a few weeks ago to make vegetable cutlets. My refrigerator was pretty much empty except for a bunch of cilantro and mint, and some carrots. I remember putting together this pulao that evening and serving it with carrot raita and pappadum. It turned out very good.
My little one asked me a few weeks later on our way back from piano, if I was going to make the soy pulav for dinner. Excited at this, I said, sure why not? My refrigerator and freezer was slightly better equipped this time, so I made it that night with green peas added to the original recipe.
It is amazing how fresh mint takes an ordinary pulao to a whole new level. This pulao is a regular in my kitchen now, I have served it to my friends' kids a few times. I think most kids would like it.
For the adults however, make sure it accompanies some spicy curry/raita/pickle.
Alternatively, you could slice a few green chillies and throw them in the pan while sautéing. Some nights I'll just use the peppermill to my advantage. According to me, fresh ground pepper gives any rice dish an instant kick :)

Ingredients-
Rice - 2 cups, uncooked (I use basmathi, any rice should be fine)
Green Peas - 1 cup, fresh or frozen
Soy granules - about 3/4 cup
Onion - 1 large, sliced
Mint - 1 - 1 1/2 cup, chopped coarsely
Ginger - 1 inch piece, finely minced
Garlic - 1 or 2 pods, finely minced
Coriander powder - 1 or 1 1/2 teaspoons
Turmeric powder - 1/4 teaspoons
Oil/ghee - 2 tablespoons (I like to use ghee in my rice dishes- they taste reallly good :)

Whole spices -
Cloves - 4 or 5
Cardamom - 3 or 4
Cinnamon - 1 inch stick
Saunf or Fennel seeds - 1/2 teaspoon

Method-
Cook the Soy granules -
In a medium sized saucepan, bring about 3 cups of water to a boil. Add the Soy granules and boil for another 2 minutes. Remove from the fire and strain immediately using a wire strainer. Sqeeze as much water out as possible and set aside.

(If I don't have the granules handy, I have used cooked soy chunks. After cooking them in boiling water, I just chop them up as small as I can).

Cook rice like you normally do and set aside on a plate to cool.

Meanwhile, in a smaller pan, heat the spices separately without burning and make a fine powder. Heat oil/ghee in a thick bottomed pan, add the onions about 1/4 teaspoon salt, sauté until the onions almost brown, 6 or 7 minutes.
Add the minced ginger, minced garlic, and saute for a couple minutes. Add chopped mint, saute for another minute. Add the turmeric powder, the ground masala powder and coriander powder. Stir fry for about 3 to 4 minutes.
Add the cooked soy granules, the frozen green peas, and another 1/4 teaspoon salt, saute for another 4-5 minutes. Combine everything well.
Remove the pan from heat and allow it to cool for about 5 minutes. Add the cooled rice, mix well and check for salt.
Remove to a serving dish and garnish with fresh mint. Sending this to JFI-Mint, conceptualized by Indira of Mahanandi and hosted by Ashwini of Ashwini's spicy cuisine.

culinarty Since this is my own original recipe, I am also sending this to the Culinarty Original Recipes #12 hosted by Lore.

Thursday, May 7, 2009

Beets Raita

A favorite in my family. All the health benefits are a bonus.
Ingredients-
Fresh Beets - about 1 cup, peeled and grated
Plain curd (yoghurt) - 2 cups
Mustard Seeds - 1/4 tsp
Jeera (Cumin seeds) - 1/4 tsp
Green Chillies - 3 or 4, chopped
Curry leaves - 1 sprig, optional but highly recommended
Salt and turmeric powder - a pinch

Method-
In a pan, add 1 tbsp oil. When it is sufficiently hot, add the mustard and jeera. After they pop, add chopped green chillies and curry leaves. Stir fry briefly and add the grated beets. Sprinkle a pinch of salt and some turmeric powder. Sauté on medium to high heat for about 4 or 5 minutes until the beets are half cooked. (If you like the beets raw, you don't have to sauté them.)
Meanwhile, add the curd to a bowl. Remove the stirfried beets from fire and add to the yogurt. Mix everything well and check for salt.
Simple. This will happily accompany any rice dish or roti. I like to serve this with aloo paratha too. Yum Yum.

Carrot Raita

A very popular favorite.
Ingredients-
Carrots - 1 cup, cleaned, peeled and grated
Plain Curd (Yoghurt) - 2 cups
Mustard seeds - 1/4 tsp
Jeera (Cumin seeds) 1/4 tsp
Green chillies - 3 or 4, chopped
Curry leaves - 1 sprig (optional but highly recommended)
Turmeric powder - 1 pinch

Method-
Mix the curd and grated carrots in a bowl. In a pan, heat about 1/2 tbsp oil and when it is hot, add the mustard seeds, jeera. While they pop, add turmeric powder, green chillies and curry leaves. Saute for a minute and add this to the yoghurt mixture. Mix well, check for salt and serve.

Yummy side to any spicy rice or paratha.

Monday, May 4, 2009

Cilantro Vegetable Rice

A popular, quick and easy rice for busy work nights. This is typically my kids' dish for parties. If I am not sure whether my little guests can handle heat, I just omit the green chillies and make sure the raitha is extra spicy for the adults. Kids can eat it with simple plain curd and of course, papadums. Makes my little guests happy and mommies smile :)

Ingredients-
Rice - 2 cups, rinsed
Fresh Cilantro - 1 cup
Onion - 1 large, sliced
Green beans - 10 or 15, sliced, thin long strips
Carrots - 2 or 3, sliced, thin long strips
Ginger - 1 inch piece
Garlic - 1 large pod
Green chillies - 3 or 4

Whole spices-
Cardamom - 5 or 6
Cinnamon - 2 inch piece
Cloves - 5 or 6
Saunf (Fennel seeds) - 1/4 tsp

Method - Cilantro Vegetable Rice
Cook rice with a little bit of salt and spread on a plate, allow it to cool. For me, pressure cooking for 4 minutes does it.
While the rice cools, heat a pan, and add about 2 tbsp oil/ghee. Add the whole spices to the oil and fry for about 2 minutes in medium to high heat.
Add the onions and sauté for about 5 or 6 minutes. When the onions are soft and transluscent, add the green beans and carrots, a pinch of salt and turmeric powder. Continue to sauté them for another 4 or 5 minutes on medium heat.
Meanwhile, add the ginger, garlic, green chillies and the cleaned and chopped cilantro to a blender jar. Add about 1 tbsp water and grind to a smooth paste.
Add the ground paste to the veggies and incorporate the paste well into the veggie mix. Fry in medium to high heat for about 2 minutes. Reduce heat, cover the pan and cook for another minute or two. When you open the lid, you should see that the vegetables are reasonably cooked in the spice mixture. Remove from fire and cool for 4 or 5 minutes.
Meanwhile the rice would have cooled enough to be mixed in. Add it to the pan and mix to combine well. Check for salt.
Transfer to a serving bowl and enjoy. We like to have this with beets raita.
I recently saw that the deadline for JFI-Cilantro has been extended to May 10th. Sending this yummy easy rice dish to JFI-Cilantro, hosted by Cilantro.

My first entry to an event. Hope I didn't miss anything!

Sunday, April 26, 2009

My Morning Muffins

Merry Blueberries Lil Miss Bubbly with her harvest of the berries had announced at the blueberry farm - 'tomorrow, we are going to have blueberry muffins for breakfast!' Mr Ken goes - 'Awesome! You should have your mom make blueberry cobbler too!' Mommy thinks hmm, I wonder if I have a muffin recipe saved.

Come muffin morning, confident with her always successful banana bread, mommy decides to give it a shot. Armed with her whip in one hand and the antique looking sheet of banana bread recipe in the other, it was recipe tweaking on the fly. Miss Bubbly helped by looking everywhere to find the missing 1/4 cup measuring spoon. Finally mommy found it in the bag of flax meal, sitting snug inside the freezer. 'At least it is not a cookbook this time', dad teases.

Yes, Mommy has saved a cookbook in the freezer. She then searched for it everywhere for the next 6 months. A long time ago.

Wheat bran.. flax meal.. what else? Measure, mix, fold, bake.
After about an hour, it was tasting time!!

Mommy by now had scribbled down everything that went in.
The milk was an almost last minute addition - otherwise it would have turned out to be a cookie!

Ingredients -
All purpose flour - 3/4 cup
Blueberries - 3/4 cup
Raw unrefined sugar - 1/2 cup
Butter - 1/2 stick (4 tablespoons)
Milk - 1/2 cup
Egg - 1
Wheat bran - 1/4 cup
Flax meal - 1 tbsp
Aluminum free baking soda - 1/4 teaspoon
Baking powder - 1/4 teaspoon
Salt - 1/4 teaspoon

Method -
Preheat the oven to 350F.
Powder the wheat bran and the flax meal in a spice grinder as fine as possible.
In a mixing bowl, add the flour, the powdered mixture, baking soda, baking powder and salt. Mix really well with a whisk to combine.
In another bowl, beat the butter. Add the sugar and beat until well creamed. Add the egg and beat well. Add the mixed flour. Add the milk and mix without any lumps. Fold in the blueberries.
Line a muffin pan with paper muffin liners. Spoon the mixture into the muffin cups until they are about 2/3 full. Bake for 20 to 25 minutes. In mommy's mini muffin pan, it took 26 minutes to be precise.

Feed your hungry family.
Muffins n milk? Muffins n orange juice ?
Muffins n cheese-omlette and milk?
That did it for Miss Bubbly this morning.
Muffins n onion-green-pepper-cheese-omlette and coffee for mom and dad.

Yield - 16 mini muffins.
12 for breakfast, 3 for an afternoon snack, 1 for a pre dinner snack for Miss Bubbly.

Oh the verdict. As a tweaked-on-the-fly muffin, this turned out to be reallly good. Not to mention the flax and bran that mommy sneaked in! Priceless.

However, some of the berries that went in the muffin were sour!
Very amateur berry pickers we turned out to be. When you eat them as is out of the bag, (or straight from the bush following Mr Ken's advice) you mostly remember the sweet ones that you don't pay attention to the sour ones that you happen to stumble upon.

We should have paid attention to Mr Ken when he said, 'start from the eighth row, y'all. I have a flag right there on the post so you don't miss it'. Mommy and daddy just followed their very own berry picking leader who ran to the other side of the farm. No wonder there weren't any u-pick customers there!

LOL. We'll be back in a few weeks Mr Ken! This time we'll pay close attention.